25th
January
2018
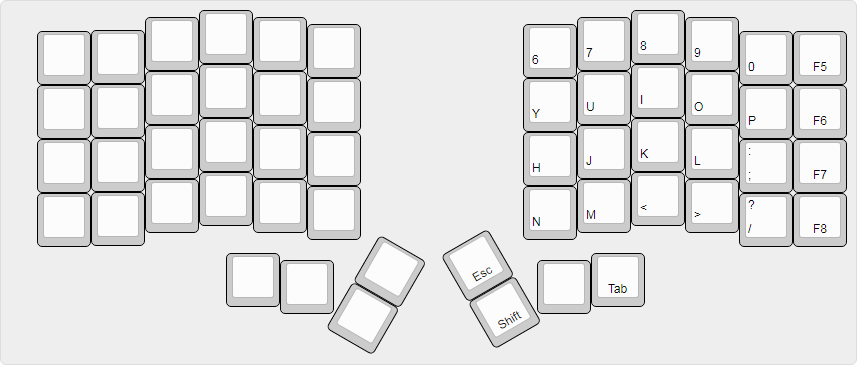
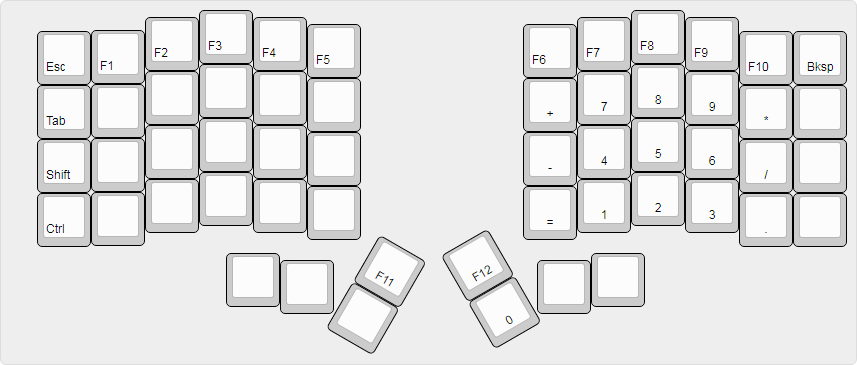
Here’s the pictures of my Iris build and my key layouts:
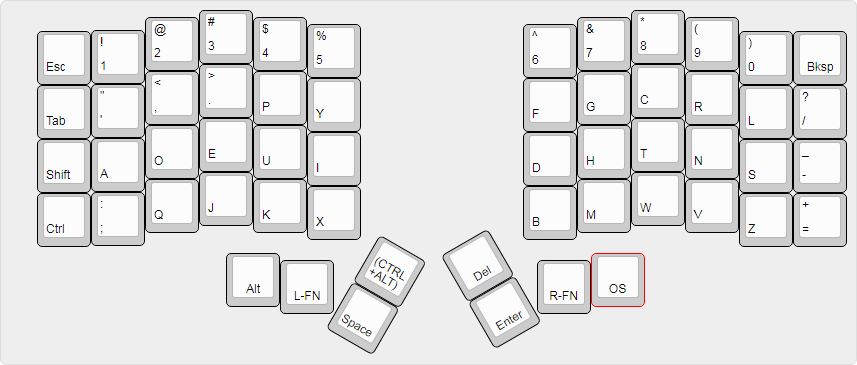
My default layer. Dvorak, baby!
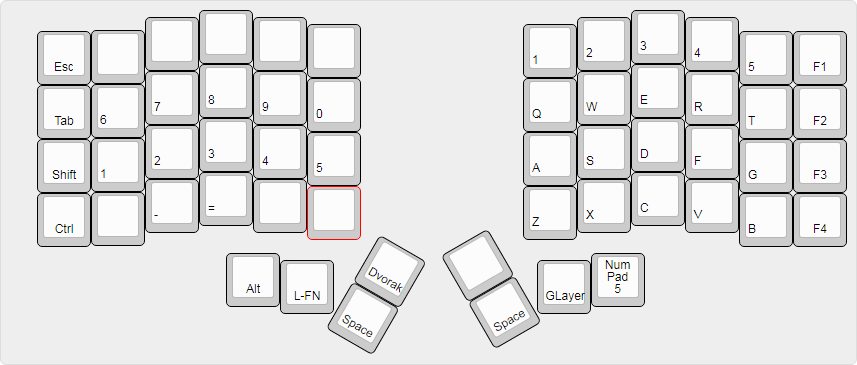
Gaming has never been easier than using this layout.
This layer is used as the other side of a ‘QWERTY’ keyboard when I hold down the GLayer key.
Left layer accessible while holding the L-FN button.

Right layer accessible while holding the R-FN button.
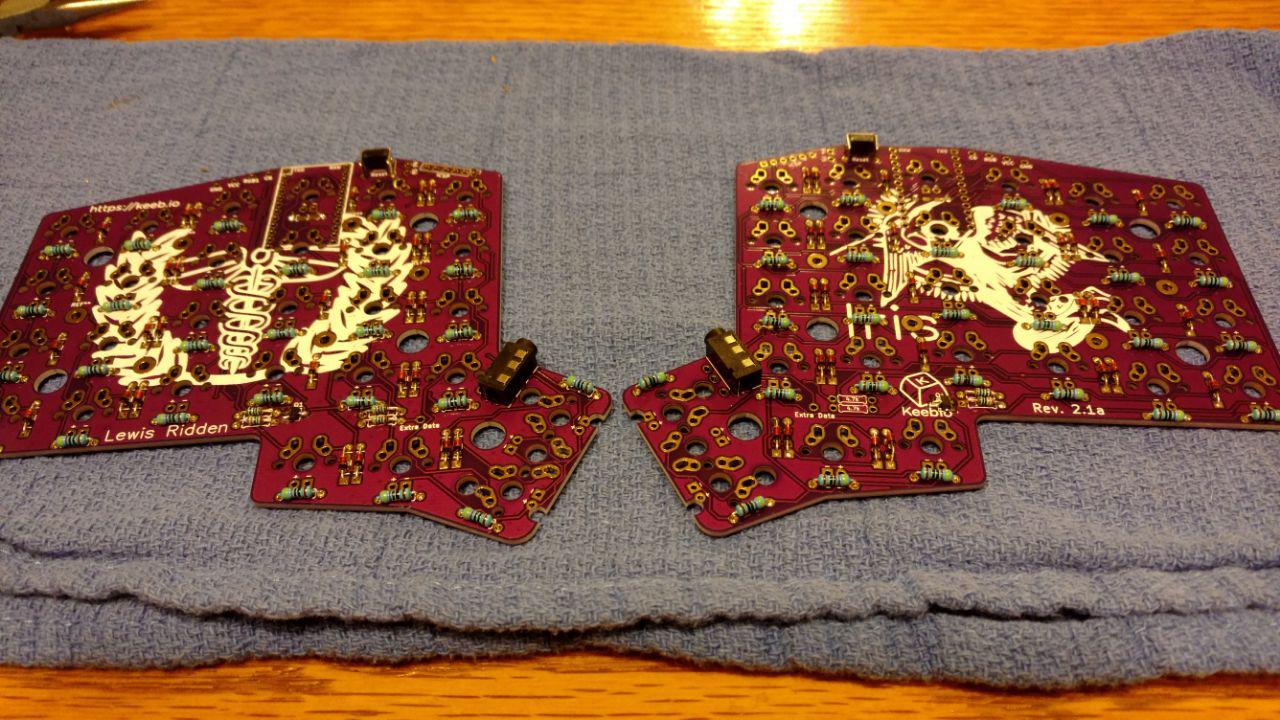
This is actually my 2nd PCB… my SD card in my phone nuked all my pictures and videos, so I don’t have any pictures of my white PCBs, but I’ll take off the bottom of one so you can see how much I’ve improved.
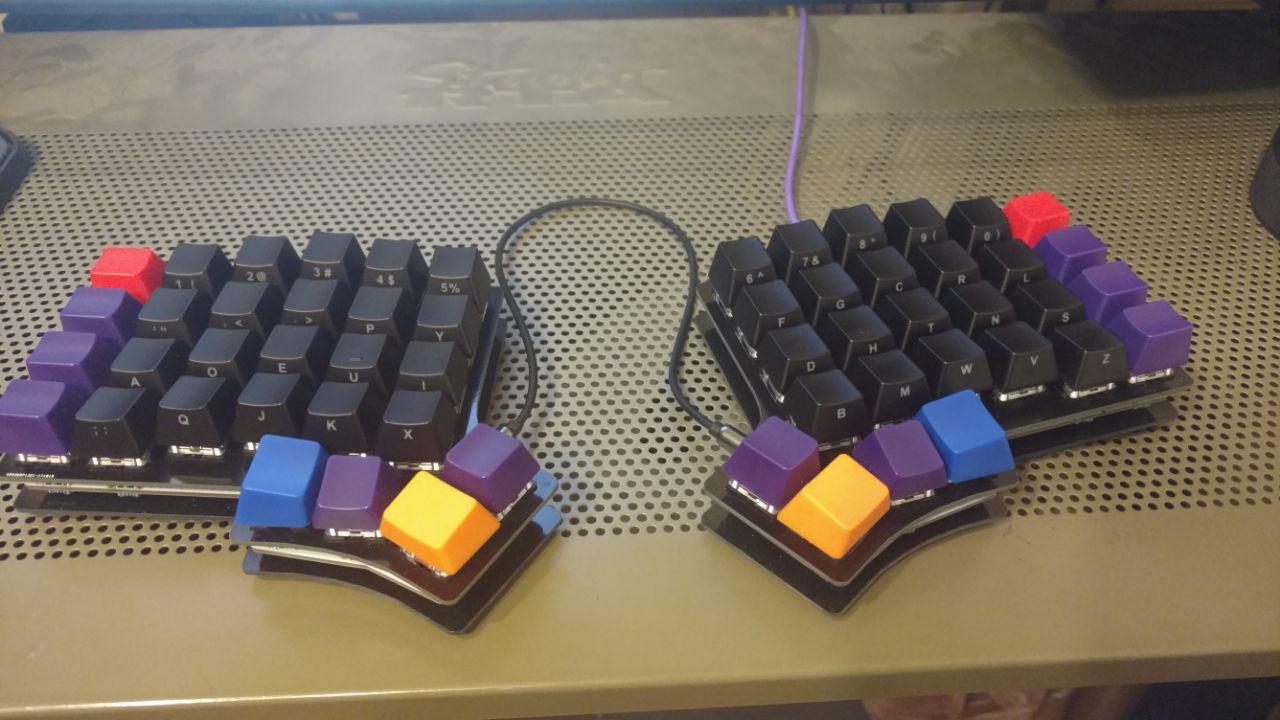
Here she is with no LEDs on.
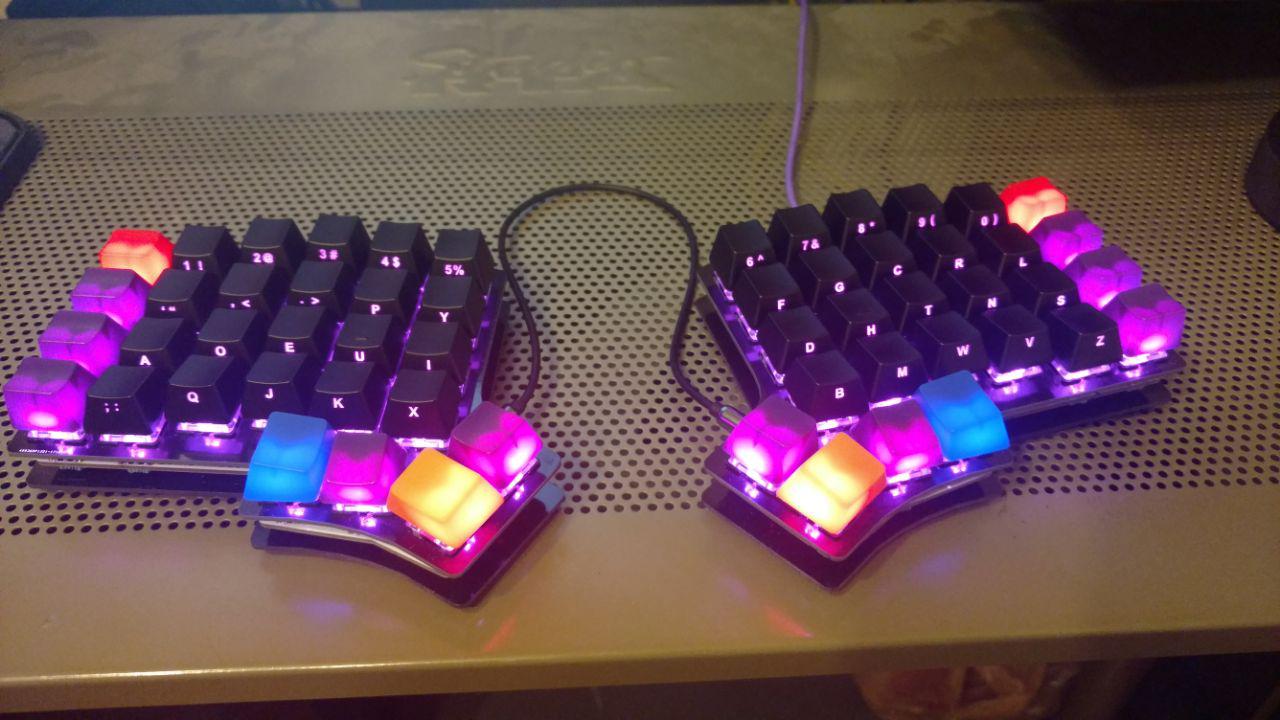
With the LEDs on.
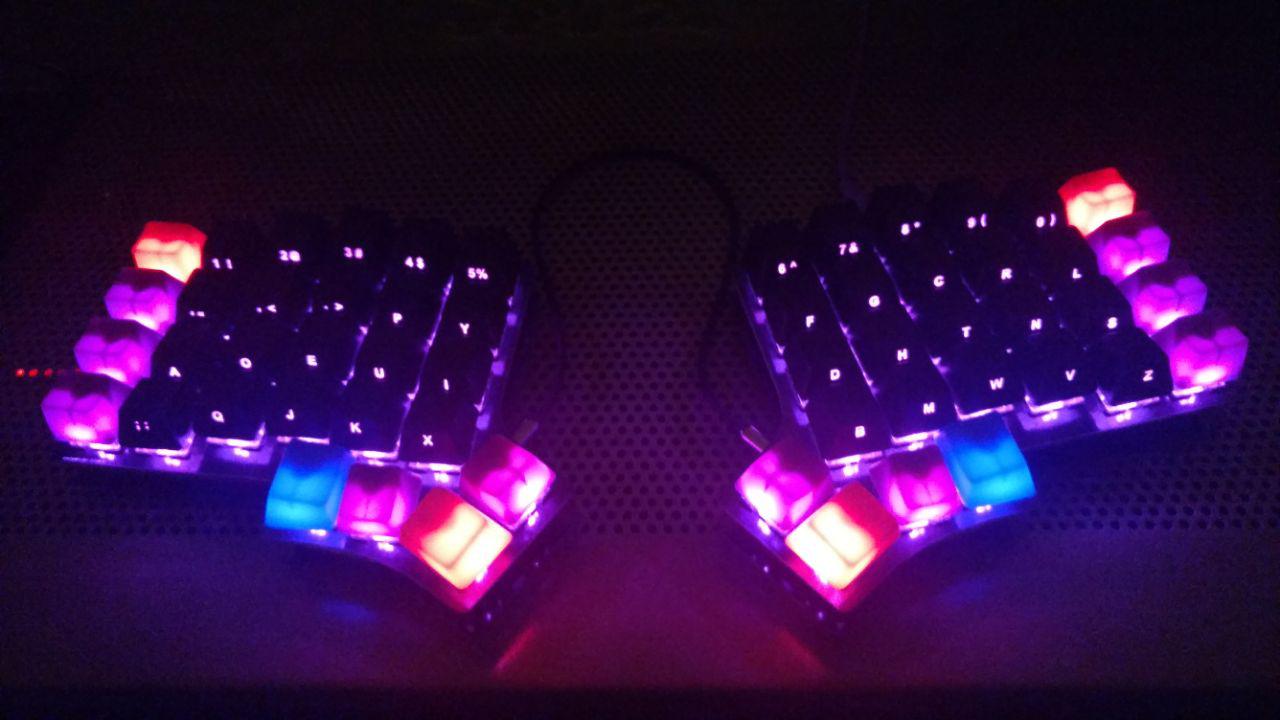
In the dark.
I loved doing this so much, I’m working on another one. I even reached out to the owner and asked if he needed a solderer and we’re engaging in an open dialogue.
Thanks for sharing in this adventure.
posted in Journal Entries |
12th
January
2018
OK. The final purchase has been made, it’s time to total up the cost.
- IRIS PCB/Case – $57.30 : keeb.io
- TRRS Cable – $3.89 – Cable required to connect the left and right keyboards together. : Monoprice
- Purple LEDs – $9.25 – Have to have back lit keyboards! : switchtop
- LED Resistors – $7.99 – Need to control the power flow to the LEDs : Amazon
- Arduino Micro Pro (x2) – $39.90 – These are a bit pricey, but I hear they’re the better ones. : Amazon
- Gateron Switches – $18.25 – Blues for my FN keys (16) and Browns for my Alpha-numeric (40). : switchTop
- Keycaps: Modifier keys and Alpha-numeric: $69. Modifiers from WASD and the Alpha-numeric from MAX.
I wasted $6.95 buying the wrong LED’s from Amazon.
The grand total for this was: $212.53.
More than I was expecting to spend on a keyboard, but it was so much fun to build and customize. I love that I can change keys on a whim, or if I find myself pressing the wrong key, I can change it and if I don’t like it, change it back. There is a little bit of coding involved, but it’s pretty simple once you see how the logic works on the firmware. I’m expecting to get my keycaps next week, and when I do, I’ll upload my pictures I’ve taken of this project. It’s been a blast, and I can’t wait to build another one.
posted in Journal Entries |